Among the many figures who aided the American Revolution, few are as intriguing—or as overlooked—as Francis Vigo. An immigrant from what is now northern Italy, a former soldier in the Spanish army, a fur trader, financier, intelligence gatherer, and supporter of the Patriot cause, Vigo played a critical function in helping secure the Old Northwest for the emerging United States. Yet despite his contributions, he spent much of his later life seeking reimbursement for money and services he provided during the war.

Brian D’Ambrosio explains.
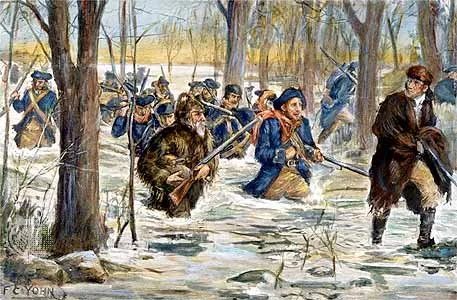
As depiction of the March to Vincennes. Source: Public domain, Frederick Coffay Yohn, available here.

What is known about Vigo's life comes from a relatively limited documentary record. Historians agree on the broad outlines of his career, though many details of his youth remain obscure.

Francis Vigo was born in Mondovì, in the Kingdom of Sardinia, in 1747. Most modern sources place his birth on December 3 of that year. His birth name was Giuseppe Maria Francesco Vigo. Little is known about his family background or childhood. At some point as a young man, he enlisted in the Spanish army and was sent first to the Caribbean and later to New Orleans, which was then under Spanish control.

After completing his military service, Vigo remained in North America and entered the fur trade. By the early 1770s, he had established himself as a merchant and trader in St. Louis, then part of Spanish Louisiana. He became familiar with the labyrinthine frontier world of French settlers, Native American nations, Spanish officials, and British interests. His business success gave him extensive knowledge of the Mississippi and Wabash river regions and brought him into contact with influential political and military leaders.

When the American Revolution spread westward, Vigo found himself in a position to influence events. Although he was not an American by birth and remained technically a Spanish subject during much of the war, he became sympathetic to the Patriot cause. His support emerged at a crucial moment in the struggle for control of the trans-Appalachian frontier.

The key figure in Vigo's Revolutionary War story was George Rogers Clark (1752-1818), the Virginia officer whose western campaign sought to weaken British influence in the Illinois Country and the Ohio Valley. Clark's capture of Kaskaskia and other British posts in 1778 threatened British authority across the region. His success, however, depended heavily upon information, supplies, and local support.

Vigo became one of Clark's most valuable allies.

In late 1778, after British Lieutenant Governor Henry Hamilton (1734-1796) reoccupied Fort Sackville at Vincennes, Vigo traveled into the area to gather information. Unaware that British forces had regained control, he was captured and detained. Hamilton eventually released him after securing his promise not to undertake actions harmful to British interests while leaving the region. Once clear of British control, Vigo immediately traveled to report what he had learned to Clark. The information he carried proved of great consequence.

Vigo informed Clark about British troop strength, defensive preparations, and Hamilton's plans for future operations. Armed with this information, Clark launched his celebrated winter march through flooded wilderness to Vincennes in February 1779. The campaign culminated in the recapture of Fort Sackville, one of the most significant American victories on the western frontier. Historians generally agree that Vigo's intelligence helped make the operation possible. Clark himself later praised Vigo's efforts, writing that he provided virtually all the information his force needed.

Vigo's contributions extended beyond intelligence gathering. He also provided financial assistance when Clark's operations faced chronic shortages of money and supplies. Frontier warfare often depended on personal credit, and Vigo used his own resources to support American efforts. Those advances became a lasting source of frustration because repayment proved elusive. Indeed, the financial risks he assumed on behalf of the revolutionary cause followed him for much of his remaining life.

After the Revolution, Vigo settled permanently in Vincennes (now southwestern Indiana), one of the oldest European settlements in the Old Northwest. He continued his commercial activities and became a respected member of the community. He also served in local militia organizations and participated in civic affairs during the formative years of the Indiana Territory.

Education became another area of his public service. Vigo supported the establishment of Jefferson Academy, which eventually evolved into Vincennes University, one of the oldest institutions of higher learning in the region. His role reflected a commitment not only to frontier commerce but also to the long-term development of communities emerging from a region that had only recently been contested ground.

Despite his earlier prosperity, Vigo's later years were marked by financial difficulties. Claims he submitted for wartime expenditures languished for decades. Perhaps no aspect of his life better illustrates the uncertain rewards of Revolutionary service. He died in Vincennes on March 22, 1836, at the age of eighty-eight. By then, much of his fortune had disappeared.

Ironically, recognition arrived after his death. Congress eventually authorized payment of a portion of Vigo's long-standing claims, along with accumulated interest. By the time reimbursement finally reached his estate in 1875, Vigo had been dead for nearly four decades.

Today, Vigo's name survives in places such as Vigo County and in monuments honoring his service. Still his larger legacy rests on his actions during one of the most precarious periods of the American Revolution. Like many traders operating along the Mississippi and Wabash rivers, Vigo moved comfortably among French settlements, Spanish officials, Native communities, and Americaan military leaders. Born in Italy, trained under the Spanish flag, and active in French communities along the Mississippi Valley, he nevertheless committed his resources and influence to the American cause.

Francis Vigo never commanded an army, drafted a constitution, or held high political office. What he did possess was a detailed knowledge of the western country, a network of commercial relationships, and a willingness to place his own finances at risk when Clark's campaign needed support. Clark supplied the daring; Vigo supplied information, credit, and local knowledge. Together, those contributions helped secure the Illinois Country and strengthen the American position in the Northwest. Indeed, while his name is less familiar than many Revolutionary figures, his contributions remain among the most consequential on the western frontier. Perhaps that is why historians continue to regard Francis Vigo as one of the indispensable, if often overlooked, architects of the American victory in the West.


Enjoyed the piece?

Join thousands of history readers getting occasional updates on new blog posts, books, and video releases — plus a free history book to get you started.

Join History Is Now here


References

National Park Service: https://www.nps.gov/people/francis-vigo.htm

George Rogers Clark National Historic Site

American Battlefield Trust biographies: https://www.battlefields.org/learn/biographies/francis-vigo

Indiana Magazine of History, digital: https://www.jstor.org/stable/27786094?seq=1
Posted
AuthorHistory Is Now Magazine
CategoriesBlog Post

If you were visiting Philadelphia in the mid-18th century — you may have lodged in, taken a meal in, or imbibed at the City Tavern. In fact — you may have done all three. Five years before the Coronavirus brought the worst US Pandemic in nearly one hundred years to the East Coast of America— I had the opportunity to experience a modern version of the City Tavern that once hosted John and Samuel Adams with that same colonial feel. The experience was every bit as incredible as the food.

Michael Thomas Leibrandt explains.

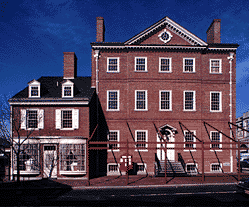
The City Tavern, part of Independence National Historic Park in Philadelphia, Pennsylvania (USA). Source: Public domain, http://www.nps.gov, available here.

By the time that the mid-1770s arrived in Philadelphia — the largest City in North America needed gathering places for both food and lodging. And although the Delaware Waterfront had a plethora of locations where those disembarking from ships could seek food, drink, and lodging like the Tun Tavern — at the corner of 2nd and Walnut — was another, perhaps Philadelphia’s more prominent Inn. The original City Tavern.

A few weeks back at the newest version of the City Tavern (built for the Bicentennial) — is opening a 1776-themed outdoor experience in the courtyard behind the building that will showcase both meals and beverages as well as an experience right from the 1700s. It’s known as the Garden at City Tavern and is just another way to get the feel of 1776 while in Philadelphia this summer. And while the current City Tavern is not the original version in Philadelphia — it sure feels like the 18th century experience.

Philadelphia’s original City Tavern was built just three years before the start of the American Revolution in 1773. By 1776 — the City Tavern was even visited by Founding Fathers. Benjamin Franklin loved the Dining Room while The Second President of the United States (John Adams) called it, “the most genteel tavern in America.”

In May of 1774 in response to the Boston Port Act —punishing colonists for the Boston Tea Party — over 150 Philadelphians assembled in the Gallery of the building. The year 1777 was big one for the City Tavern. The one year anniversary of America’s Independence was celebrated there, George Washington met Marquette De Lafayette there, and during the British Occupation of 1777? The upstairs lodging housed British Officers while the basement was a prison for American Patriots. In 1783 — friends of George Washington even gathered there before he returned to Mount Vernon.

Fifty years later in 1834 — the building was significantly damaged and was demolished in 1854 — at approximately the same decade that the last retaining walls of the President’s House at 6th and Market were torn down to build Independence Mall. A replacement structure was constructed prior to the 1976 Bicentennial. Six years ago — the City Tavern ceased operations — partially because of the loss of business from the Covid-19 Pandemic.

The Garden at City Tavern will be welcoming visiting tourists and residents alike for the next few months — between Thursdays and Sundays.


Enjoyed the piece?

Join thousands of history readers getting occasional updates on new blog posts, books, and video releases — plus a free history book to get you started.

Join History Is Now here


Michael Thomas Leibrandt lives and works in the Philadelphia Suburbs.

Posted
AuthorHistory Is Now Magazine

Keeping a watchful eye over Philadelphia for nearly 255 years — Fort Mifflin is much more than just a decaying structure overlooking the Delaware River. It’s the site of Philadelphia bravery during the American Revolution — and its faded white masonry walls still bear the battle scars of American Freedom from 1777 — just as the unearthed cell (Casemate #11) found in 2006 and believed to encapsulate both graffiti as well as a coin and wine bottle from the Civil War.

Michael Thomas Leibrandt explains.

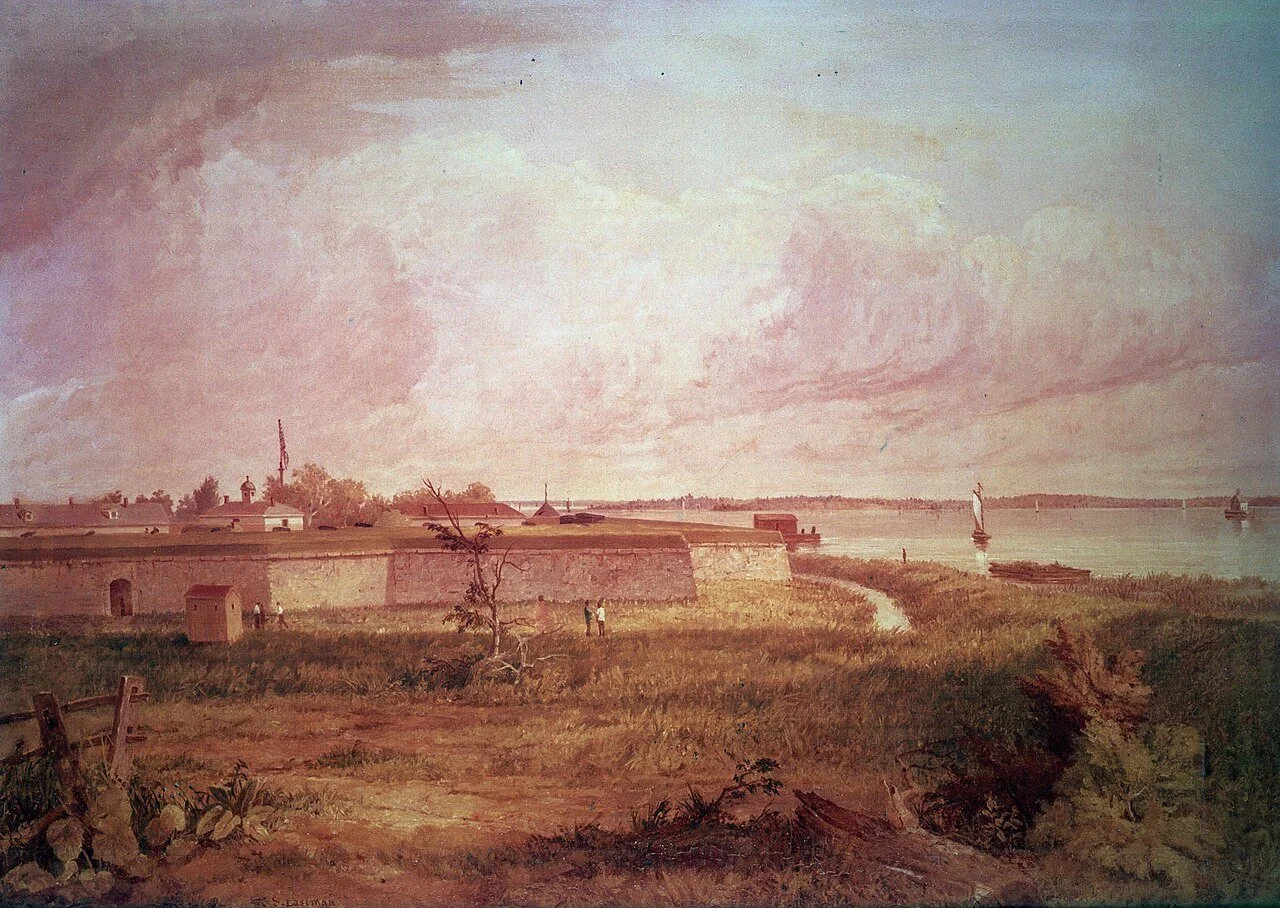
Fort Mifflin by Seth Eastman. Source: Public domain, available here.

If you want to see the true measure of the humble beginnings of American democracy and resolve — visit Independence Hall. If you want to see military determination and heroism in the face of nearly insurmountable odds in order to defend the Delaware River— then visit Fort Mifflin. And that very heroism — may have saved General George Washington’s Continental Army.

First constructed on Deep Water Island in the Delaware River in 1771 — Fort Mifflin was originally named Fort Mud at the time of the American Revolution. The British — after defeating Washington’s Army at the Battle of Brandywine in 1777 — may have captured Philadelphia with hardly a shot fired. But at Fort Mifflin — they found an unyielding resistance.

Some four hundred American soldiers had entrenched in Fort Mifflin — hampering British efforts for control of the Delaware. From his headquarters in Philadelphia — General Howe ordered the British fleet up the Delaware River to supply his army in Philadelphia. The resistance of those brave four hundred Patriots from within the Fort was challenged by what is considered to be the largest cannonade in all of the American Revolution — culminating with a massive bombardment on November 10th of 1777. Under the cover of darkness each night — French Major Francois de Fleury oversaw repairs to the Fort.

With only ten cannon left to defend the Fort — Commanding officer Major Thayer and his men abandoned Mifflin on November 15th — famously setting the fort ablaze in the night sky with the American Flag still fluttering in the darkness. The result of the efforts of those Americans in Fort Mifflin who defended against the British — Washington’s Continental Army was able to make it to winter encampment at Valley Forge.

The British would hold the Fort until their retreat from Philadelphia in June 1778. After the Revolution — Fort Mud was actually rebuilt and in 1795 — it was renamed after Continental Army Officer and Pennsylvania Governor (Thomas) Mifflin. When repairs to Mifflin were finally complete in 1863 — it actually held Confederate prisoners — including a significant number from the Battle of Gettysburg from across the state. The Fort actually endured a prisoner rebellion in 1863 and an ultimately doomed tunnel escape in 1864 also by inmates. One prisoner was even executed there in 1864.

Fort Mifflin’s role was a bit different during the First and Second World Wars. Funds were allocated for the repair of Fort Mifflin and a railroad was constructed which would serve to connect Fort Mifflin to both of the Depots of the Army Corps of Engineers Depot and the Naval Ammunition.

The Army declared the site as a (national) historical monument in 1915 and finally decommissioned it in 1954. Threeyears ago — a replica cannon was stolen from Fort Mifflin’s 14-foot exterior wall. Ownership of Fort Mifflin was transferred to the city of Philadelphia in 1962.

Today — visitors can still see Fort Mifflin for themselves for nearly ten months of the year. Tours are available, events are scheduled regularly during certain months, and weekends even have a ceremonial cannon firing at Philadelphia’s aging Fort from a bygone era being celebrated around America this year. For Philadelphia — Fort Mifflin means a lot more than just that.


Michael Thomas Leibrandt lives and works in Abington Township, PA.

Posted
AuthorHistory Is Now Magazine
CategoriesBlog Post

Called upon to surrender the Delaware River fortification of Fort Mercer, Patriot Colonel Christopher Greene responded, “We ask no quarter and will give none.”  Pointing to the American ramparts, Hessian Colonel Carl von Donop of the besieging force made a bold proclamation of his own declaring, “Either that will be Fort Donop or I will be dead.”  On October 22nd, 1777, both commanders would make good on their stirring words.

Here, James F. Byrne Jr look at the 1777 Battle of Fort Mercer in the American Revolutionary War.

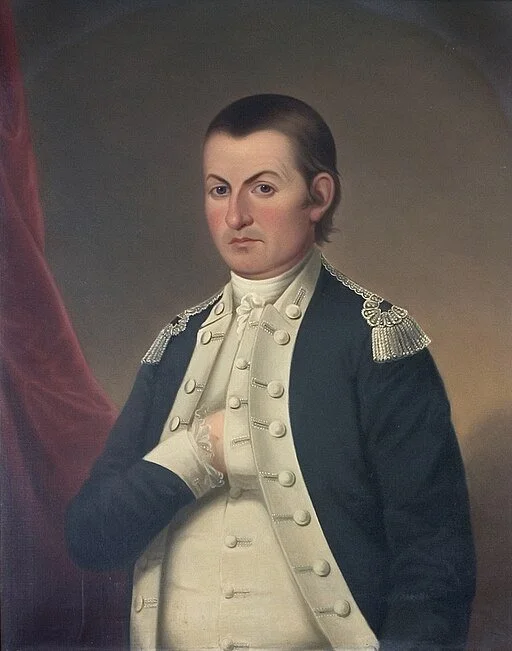
Patriot Colonel Christopher Green. Painting by James Sullivan Lincoln.

Following the defeat of the Continental Army at Brandywine, the British occupied Philadelphia.  British General Sir William Howe controlled the American capital, but not the supply route needed to support his large force.  Howe needed the Delaware River to move supplies.  Unfortunately for his plans, the Patriots controlled a section of the river four miles south of the capital with two forts and a small fleet.  Howe’s operations to clear the river resulted in a strategic victory, but not before his forces suffered a humiliating tactical disaster in one of the most lopsided American victories of the Revolutionary War.

Patriot defenses at Red Bank (a strategic bend in the river) consisted of Fort Mercer on the New Jersey shore and Fort Mifflin located on a nearby island.  Fort Mifflin boasted 28 guns mounted in a log palisade.  Fort Mercer consisted of earthen ramparts supporting 14 guns and manned by 400 Continentals under the command of Colonel Greene. 

An eclectic but formidable naval squadron of sloops, schooners and row galleys protected the forts.  The squadron also overwatched significant obstacles consisting of iron tipped timbers anchored to the river bottom.

Howe elected to launch a joint naval and land assault to clear his riverine supply line.

Two thousand Hessians under the command of Colonel von Donop would seize Fort Mercer.  Von Donop had the misfortune to be in charge of the Hessian garrisons in New Jersey when Washington crossed the Delaware and captured the outpost at Trenton.  He eagerly viewed the coming assault as an opportunity to reburnish his tarnished reputation.


Offense

On October 22nd the British offense commenced.  A fleet which included six ocean going vessels made its way up the Delaware and ran into shallow waters, underwater obstacles, and a hornet’s nest of small, maneuverable, Patriot warships.  Two of the British behemoths ran aground and were destroyed the next day. 

Simultaneously with the Royal Navy’s fiasco, the Hessians entered the fray.  Approaching Fort Mercer from the Jersey shore von Donop launched an assault after only a cursory reconnaissance.  Colonel Greene, a veteran of both Bunker Hill and Quebec, was well served by his scouts and knew of the Hessian advance.  He withdrew his men from the outer walls into an internal redoubt protected by a ditch and extensive abatis (sharpened, felled trees).  Observing the abandoned outer positions, von Donop assumed the Americans were withdrawing and launched an immediate attack.

The Hessian scaled the abandoned outer parapets and found themselves blocked by extensive abatis, a wide ditch, and American artillery and infantry positioned along the main walls of the fort.  The Hessians lacked the tools to cut through the abatis or cross the ditch and milled around helplessly while the Americans poured fire into their ranks.  Perhaps the final straw, ships of the American squadron moved into position to join in the bloodletting.  In less than 30 minutes the Hessians retreated, having suffering 700 casualties.  American losses were less than 40.


Context

Three weeks later, the British deployed additional artillery, infantry, and warships around Red Bank, leading the Americans to scuttle their fleet, destroy their fortifications, and withdraw.  Their logistic waterway secured British supply vessels reached Philadelphia on November 26th.  The British (now well supplied) spent the winter of 1777-78 in the relative comfort of Philadelphia.  However, it had taken seven weeks to clear the American defenses from the Delaware and required the commitment of much of the British force.  While Howe orchestrated this operation, Washington was able to rest and resupply his bedraggled army in relative peace, and move into austere but safe winter quarters at Valley Forge. 

As for the commanders who fought at Fort Mercer, they were remarkably prescient.  Colonel Greene’s brilliant defense ensured he had no need to seek quarter.  As for Colonel von Donop, he was not able to grace Fort Mercer with his name, but he did indeed fall while leading the assault, and subsequently died of his wounds.


Lessons Learned

Combined Arms do not Guarantee Victory – The British assault included overwhelming artillery, infantry, and naval forces, and failed overwhelmingly.

Don’t Forget Nothing – The Hessians lacked the tools needed to breech Patriot obstacles and suffered accordingly.

Weapons Deployed Must Meet Tactical Requirements  - Large British warships were unable to adapt to river conditions or the highly maneuverable Patriot squadron.

Obstacles Covered by Fire may be Insurmountable -  Patriot fires converted their obstacle belt into a death trap.

Deception is a Combat Multiplier – Patriot withdrawal from the outer defenses led to the Hessian ill-planned, disastrous assault.

Know What You are up Against – Inadequate reconnaissance resulted in the overwhelming defeat of the Hessian attack. 

Courage is Necessary but not Sufficient -  von Donop led his troops from the front, but his leadership skills did not match his bravery.


The site has been offering a wide variety of high-quality, free history content since 2012. If you’d like to say ‘thank you’ and help us with site running costs, please consider donating here.

The Siege of Ninety Six was a siege in South Carolina in the American Revolutionary War from May to June 1781. The Patriot Nathanael Greene led a force of 1,000 in a siege against Loyalists in Ninety Six. The siege took place around Star Fort. Abrielle M. Lamb explains.

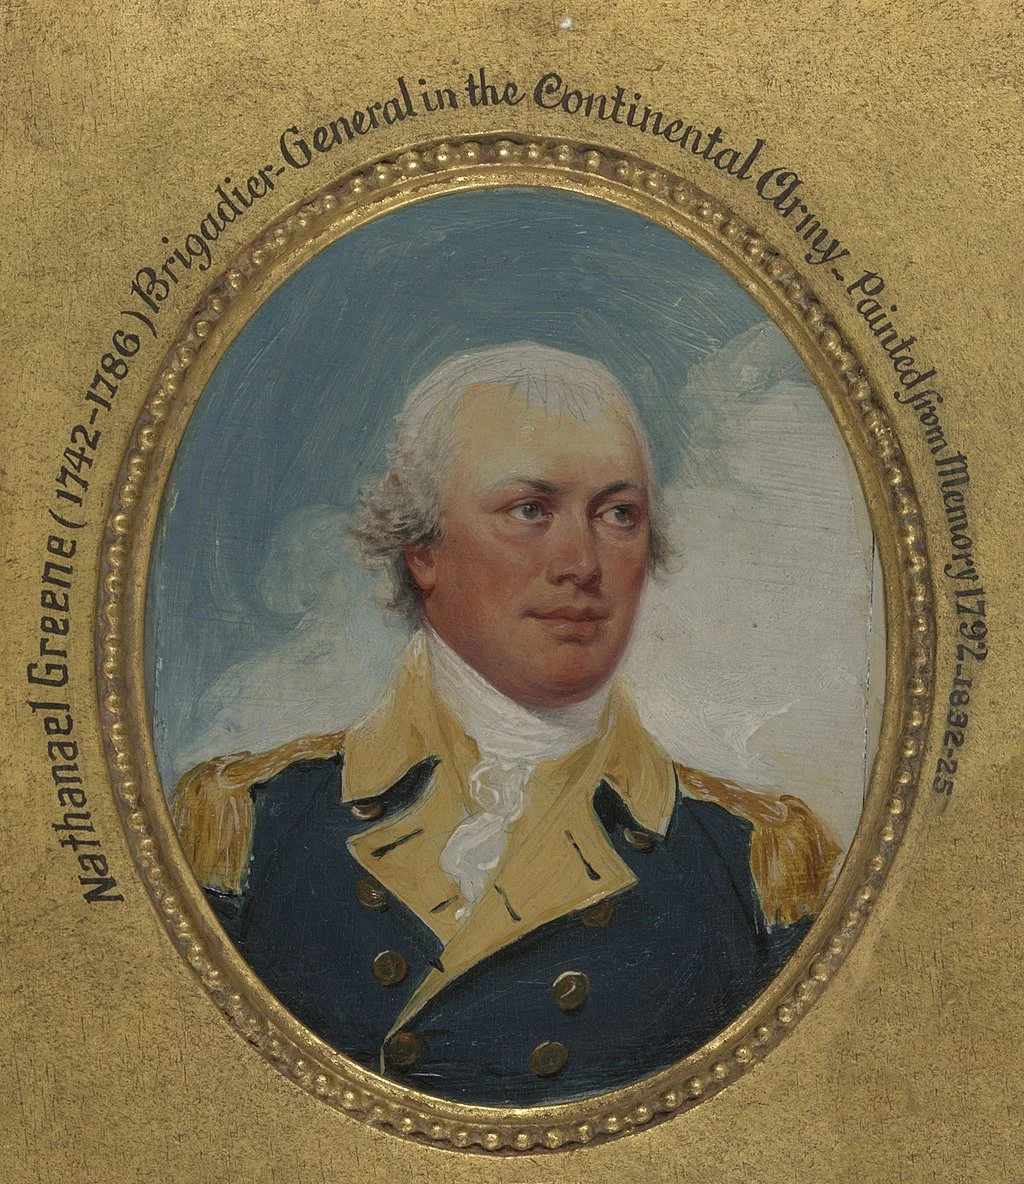
Nathaniel Greene. By John Trumbull, 1792.

Patriots and Loyalists

During the American Revolution, there were two major groups that emerged in the colonies concerning war efforts and conflicting sentiments towards England. Many are familiar with the patriots, the revolutionists who dumped tea in the harbor and challenged the authority of the King. However, there were a number of individuals and communities in the colonies who did not align with the patriot movement or desire independence from the crown; these groups were known as loyalists. Loyalists supported the English Monarchy in retaining power over the colonies and a continuation of their reign in America. In the struggle between patriots and loyalists there was a significant landmark that is less discussed compared to larger memorials or battle sites but, nonetheless, should be remembered. A major loyalist community during the American Revolutionary Era was Ninety Six in South Carolina. There had been a considerable amount of tension in this area before and during the Revolution between patriots and loyalists; however, it was the loyalists who had control of this area. Star Fort shielded the settlement of Ninety Six, according to The American Battlefield Trust, “Ninety Six was protected by the formidable Star Fort and the smaller Stockade Fort. Its garrison was made up almost entirely of loyalist colonists.”[1]


Star Fort

The Star Fort would prove to be a truly significant location during the American Revolution, specifically during the siege of Ninety Six in the latter half of the war. Star Fort was designed, as its name suggests, in the shape of a star which differed from the common square fort layout at that time. The fort was set into the ground, making the walls thick mounds of earth. The construction of the fort lasted from December of 1780 to early 1781. The star shaped design was not a common or largely desirable layout as capacity for soldiers was greatly reduced, and the design was more difficult to construct than the average square forts. However, loyalist engineer, Lt. Henry Haldane was convinced that the unique shape with its eight points would be more beneficial in the long run. The benefit that Haldane saw in the design was that the points of the star made it possible for musket and cannon fire to cover all sides and shoot in every direction from the fort's walls.[2] Though it was constructed using an uncommon design, it proved a strong front for the British Army and loyalist forces.


Nathanael Greene and His Siege

The patriot revolutionist, Nathanael Greene, launched a famous attack known as the Siege of Ninety Six which took place from May 22 – June 18, 1781. On June 18, Greene issued an attack on the fort, while at the same time, British troops were traveling from Charleston to Ninety Six to support and defend their forts. It was with some hesitation that Greene gave the order, but he did order the attack on Star Fort. The battle lasted for just under an hour in which time Greene’s men valiantly attempted to take the fort from the loyalists but were inevitably forced to retreat. The incoming British troops from Charleston arrived two days after Greene’s army withdrew from the area. The loyalists had indeed held their ground but after the siege British officers concluded that their position was too vulnerable and abandoned their post.[3] There are several reasons that the Star Fort was significant during the American Revolution, two of the main points of its importance rests in Greene’s attack and Britian's inevitable abandonment of the fort. Greene’s attack on the fort was important because although Greene had to retreat while the loyalists held their position at Ninety Six, he had launched a daring attack. Greene’s continued fighting and strategy in North and South Carolina during the war greatly contributed to American independence.[4] The impact that Green’s siege had on the British was significant. When they abandoned the fort, they destroyed what was left after the siege and burned the buildings that remained. The war continued and there were other battles fought in the southern colonies but the British departure from the fort effectively brought an end to the British occupation at Ninety Six.[5] Though Greene did not take Star Fort during his siege, he showed his strength and the courage of his men; and although the British Army held Star Fort, they were ultimately forced to abandon their position.


The Star Fort Today

Today, visitors can walk out to the Star Fort and battlefield which has undergone very little reconstruction since its original construction. The National Park Service comments, “The siege trenches are partially reconstructed, but the Star Fort is original. The Star Fort was an earthen fort. As you see it today is how it looked in 1781... The walls are a little weatherworn in places, but are original.”[6] There are many benefits to visiting physical locations for research and learning. Visiting Star Fort would be helpful for anyone studying the American Revolution to be able to gain a better understanding of how the fighting took place and to see the impressive star shaped fort that had such a large impact on the southern battles, fighting, and strategy during the war for independence.


Did you find that piece interesting? If so, join us for free by clicking here.


Bibliography

“Ninety Six.” American Battlefield Trust. Last modified October 5, 2022. https://www.battlefields.org/learn/articles/ninety-six.

“The Star Fort.” National Parks Service. U.S. Department of the Interior. Last modified August 30, 2024. https://www.nps.gov/nisi/learn/historyculture/the-star-fort.htm.

Cann, Marvin L. “War in the Backcounty: The Siege of Ninety Six, May 22-June 19, 1781.” The South Carolina Historical Magazine 71, no. 1 (January 1971): 1–14.

Fore, Samuel K, and Walter B Edgar. “NINETY SIX, BATTLES OF (1775, 1781).” Essay. In 101 People & Places That Shaped the American Revolution in South Carolina, 103–105. Columbia, SC: University of South Carolina Press, 2021.

“Star Fort Image - Online Tour Stop 11.” National Parks Service. U.S. Department of the Interior, n.d. Accessed October 20, 2025. https://www.nps.gov/nisi/learn/photosmultimedia/online-tour-stop-11.htm.


[1] “Ninety Six.” American Battlefield Trust. Last modified October 5, 2022.

[2] “The Star Fort.” National Parks Service. U.S. Department of the Interior. Last modified August 30, 2024.

[3] Samuel K. Fore and Walter B Edgar. “NINETY SIX, BATTLES OF (1775, 1781).” Essay. In 101 People & Places That Shaped the American Revolution in South Carolina, 103–105. Columbia, SC: University of South Carolina Press, 2021.

[4] “Ninety Six.” American Battlefield Trust. Last modified October 5, 2022.

[5] Samuel K. Fore and Walter B Edgar. “NINETY SIX, BATTLES OF (1775, 1781).” Essay. In 101 People & Places That Shaped the American Revolution in South Carolina, 103–105. Columbia, SC: University of South Carolina Press, 2021.

 [6] “The Star Fort.” National Parks Service. U.S. Department of the Interior. Last modified August 30, 2024.

Posted
AuthorHistory Is Now Magazine
CategoriesBlog Post

The Battle of Cowpens has been called by many as "The perfect tactical battle.” It is also known as the battle that saved the South for the colonial army and the turning point of the United States' War for Independence. And perhaps it's fair to use all of these monikers to describe it.

However you want to describe it, it was a victory that the colonists needed in the worst way. After their army was almost completely destroyed at the Battle of Camden, the victory at Cowpens saw the defeat of a feared British commander and started the dominoes that led to George Washington's victory at Yorktown.

Greg Simbeck explains.

The Battle of Cowpens. By William Ranney, 1845.

War Shifts to the South

By the time of the Battle of Cowpens, the Patriots' southern forces were in disarray. British General Lord Charles Cornwallis brought the war to the South to take advantage of the large Loyalist population. These were individuals in the colonies who were still loyal to King George of England. 

And with loyalist assistance, the British had already captured Charleston, South Carolina, massacred colonial troops at the Battle of the Waxhaws, and dealt a crushing defeat to the Southern American army under General Horatio Gates at the Battle of Camden.

The only things that were holding the Patriot cause together in the South were the Overmountain Men's defeat of British Major Patrick Ferguson's forces at the Battle of Kings Mountain, and the harassment of partisans like Elijah Clark, Thomas Sumter, and the "Swamp Fox," Francis Marion. It was in this environment that General Nathanael Greene was appointed by General. George Washington on October 14, 1780, to take command of the Patriot effort in the South.


Greene Takes Command

The group that greeted Greene when he assumed command of the Southern Continental army at present-day Charlotte, North Carolina, on December 3, 1780, was low on morale, and a "ghost of an army" with little equipment, clothing, supplies, or the will to fight. The group consisted of 2.300 men, but only 1,500 were present that day, and far fewer were equipped to do battle. Provisions were low, and clothing was almost non-existent.

On his way down to North Carolina, Greene attempted to procure additional funds from the leaders of Delaware, Maryland, and Virginia, but they were all low on money and credit. In addition, moving an army from point to point in the South was hampered by a lack of roads and swamps that were hard to navigate. Next, Greene did the unthinkable.

He decided to split his army in two to play a war of harassment with the British until he could recruit more soldiers to fight a pitched battle.

Greene was fortunate that "The Old Waggoner," Brigadier General Daniel Morgan, had come out of retirement to aid the cause. Morgan earned his nickname when he drove wagons for the British during the French and Indian War. After striking an officer, he received 500 lashes, which would kill most men. From then on, he had a deep hatred for the British army. 

Green sent Morgan and 600 men to the Western part of South Carolina to threaten the British forts in the area. Cornwallis countered this move by dispatching Lieutenant Colonel Banastre Tarleton and his British Legion to destroy Morgan and his army. Tarleton was hated by the Colonials due to his ruthlessness and apparent massacre of forces at the Battle of Waxhaws.


Prelude to the Battle

Tarleton's scouts located Morgan's army five days before the Battle of Cowpens. His dragoons closed the gap on the colonial troops, and a skirmish between Morgan's cavalry under the command of Lt. Col. William Washington and a large group of Tories resulted in Washington's capture of 40 British sympathizers. On January 15, Morgan sent a message to Greene saying he didn't think he could defeat Tarleton with the number of troops he had.

But Tarleton's close proximity to his force changed his decision. As Tarleton closed in on Morgan and his troops at  "Hannah's" Cowpens, a frontier pasturing ground, with the Broad River at his back, Morgan decided that he and his troops would stand and fight at this location. Morgan spread word to the militia in the area to rendezvous at the Cowpens. Col. Andrew Pickens' militia began to arrive in camp on the eve of the battle.

The field at Cowpens was a half mile wide and one mile long. There were first-growth pines and hardwood, but no undergrowth. The field had a sloped ridge, which led to a shallow swale, then rose to another slightly higher ridge. Behind the highest point of this ridge was a deep gully that could obscure the location of Morgan's cavalry.


Battleplan and Disposition of Troops

Morgan used the topography of the field and his knowledge of Tarleton to create his battle plan. His troops would form three lines of battle. The first line would consist of skirmishers from the Virginia Militia, under the command of Majors. John McDowell and John Cunningham. Their orders were to fire two volleys and retreat to the second line, some 150 yards behind them.

Manning the second line was the militia of North Carolina, South Carolina & Georgia, commanded by Colonel Pickens. They were also ordered to fire two volleys and then repair back to the third line, 150 yards up the hill. Both of these lines would include some army veterans to help stabilize these militiamen.

The third line had 450 Continental troops, commanded by Lt. Col. John Howard. They would be flanked on both sides by 200 Virginia independent riflemen. Washington's cavalry would be hidden in the deep gully out of sight in reserve.

Morgan knew that the militia was prone to retreating when the fighting started. Still, with the Continentals behind them and the swollen, unpassable Broad River behind all of the troops, they would be forced to stand and fight. Morgan, knowing Tarleton's aggressive nature, would see this as a full retreat of the militia. He would send his dragoons in, thereby exposing them to the full force of the third line of Continentals.

There is still great debate about how many forces Morgan commanded at Cowpens. Morgan, in his official report, placed the number at 800. Tarleton would report back to Cornwallis that he faced opposition from 1,900 men. Consensus puts the number at around 1,000. Rough breakdown of his troops is as follows:

  • Militiamen: 533

  • Continentals: 237

  • Cavalry: 80

  • Independent Riflemen: 200


Tarleton's battle plan was simple and uncomplicated. The majority of his infantry would line up in a linear formation and head straight to Morgan. The flanks of this line would be protected by cavalry. The 250-man battalion of Scottish Highlanders commanded by Major Arthur MacArthur was the reserve corps. And Tarleton kept the 200-man cavalry contingent of his Legion ready to attack the Americans when they broke and ran.

Tarleton had the following contingent of 1,000 troops:

  • British Regulars: 500

  • Cavalry: 300

  • Loyalists: 276

  • Artillerymen: 24


Battle

Tarleton roused his troops at 2 am on January 17, 1981, and marched toward the Cowpens. He rode his troops hard, and forty-eight hours before the battle, the British ran out of food and water, and were operating on under four hours' sleep. His men arrived at the site of the battle hungry and tired. Morgan's men, having arrived at the Cowpens on January 13, were rested and well-fed.

So the battle would begin at 7 am as Tarleton and his army arrived at the Cowpens. His first battle line was from right to left: the Light Infantry Battalion, the British Legion, and the 7th Fusiliers, along with two small cannons. Protecting the flanks were 50 dragoons on each side. Their presence there would also threaten the colonists' flanks. Tarleton's reserves consisted of MacArthur's Highlanders and 200 horsemen from the British Legion.

Tarleton, in his desire to destroy Morgan and his troops, signaled for the attack to begin before all of his army was in formation. He then directed some of his dragoons to break up the skirmish line. The skirmishers followed their orders and fired their two volleys, and one group retired to the second line while the other fell into the third line alongside the Continentals.

Tarleton recalled the dragoons who had suffered some losses while simultaneously, his right wing started their charge, accompanied by cover from the two cannons, as they thought the Americans were in full retreat. The British were able to reform their line somewhat. When they came within 150 yards of Pickens and his militia, the militia fired a deadly volley into Tarleton's oncoming troops, injuring and killing several infantrymen and mounted legionnaires.

The militia fired another volley and dropped back to reform on the left side of Howard's line. The veteran British soldiers reformed their ranks and continued their advance. Tarleton, seeing another group of retreating Americans, released 50 dragoons to pick off the retreating colonists. In panic, some militiamen did not reform and instead kept running.

Morgan understood the gravity of the situation and sent Col. Washington's cavalry to disperse the dragoons, which they did. Meanwhile, Morgan and Pickens rallied most of the militia and they reformed directly behind Howard's line. Tarleton, believing that victory was at hand, called for the Highlanders to attack on the left while his cavalry would assault the American right.

A ferocious battle ensued with neither side giving ground. Morgan noticed that the Highlanders were starting to overlap Howard's right flank and called on Col. Washington to attack the Highlanders before they could overwhelm the Americans. At this point, someone in Morgan's command mistakenly called for a retreat.. Somehow, Morgan and Howard were able to reform the lineup on the rising slope. This was the turning point of the battle.

Once again, seeing the Americans retreat, Tarleton and his men could smell blood. They ran up the slope in a disorganized fashion, where they ran into a deadly volley from Howard's Continentals. This stopped the British in their tracks, and sensing their confusion, Col. Howard called for an all-out charge with bayonets. Before this, Tarleton had sent the rest of his cavalry into the fray.

But to their surprise, they received a volley from an unknown source. They tried to rally, but Pickens' men, who had fired the volley, charged Tarleton's cavalry, led by Morgan. With Washington sweeping down on the British from the right and Morgan and Pickens assaulting on the left, Tarleton and his men were caught in a double envelopment. This sent most of his force into a panic, and they retreated in haste, with many dropping their arms when they fled.

No matter what Tarleton and his officers said or did, they could not prevent the rout. Washington's cavalry swept down, capturing most of the fleeing soldiers and their two cannons. The Highlanders tried to hold back the forces of Morgan and Pickens, but with the loss of their cavalry support, they were soon overtaken by Col. Howard's men on the other side, and they broke in panic. Shortly thereafter, Maj. McArthur would surrender his sword to Pickens.

Tarleton, attempting to rescue the Highlanders, approached with 55 dragoons but were immediately intercepted by Col. Washington and his cavalry and the British were forced to leave the field. The Americans gave chase, and Washington and his force caught up to Tarleton and some of his men. Tarleton parried with Washington, but after seeing the futility of the situation, he shot Col. Washington's horse out from under him and rode off.


Aftermath

British casualties at the Battle of Cowpens were 110 killed, 229 wounded, and 800 captured or missing. American totals were 25 killed and 124 wounded. Daniel Morgan and his troops won a game-changing battle for the fledgling colonials. Military instructors and historians still study Morgan's tactical brilliance in the battle.

After that battle, Morgan would reunite with Greene in North Carolina to continue to fight the ongoing war in the Southern Theatre. Unfortunately for Morgan, back and other ailments forced him to leave the army and return to his Virginia home.

As for Tarleton and the British army in the South, he would continue to serve under Cornwallis, but his defeat at the Cowpens soiled his reputation and depleted the British army of valuable troops. The battle forced Cornwallis to chase Greene and Morgan into North Carolina, where he would engage in several small, inconclusive, but costly battles with the American forces. Tired and lacking supplies, he left for Yorktown, Virginia, to rest his troops and resupply.

As we all know, while at Yorktown, he was surrounded by George Washington's army, the French navy, and a French army contingent under the command of Lt. Gen. Comte de Rochambeau and was forced to surrender on October 19, 1781. This would be the last major conflict of the American Revolution. Two years later, both parties signed the Treaty of Paris, allowing the United States to finally gain its independence.


Did you find that piece interesting? If so, join us for free by clicking here.

The magnitude of the Patriot disaster at Penobscot Bay was fully realized when the bedraggled survivors staggered back into Boston.  An armada of 44 ships carrying Massachusetts militiamen had embarked from Boston on July 19, 1779,  to eliminate a small British detachment located 250 miles north on the Bagaduce Peninsula (which jutted into the bay).  The expedition was less than successful.  As acerbically reported by the Boston Independent Chronicle, “our irregular troops made an irregular retreat … without any loss excepting the whole fleet.”

James F. Byrne Jr explains.

Destruction of the American Fleet at Penobscot Bay, 14 August 1779. By Dominic Serres.

British military efforts had shifted to the mid-Atlantic and southern states following their defeat at Saratoga in October 1777.  However, His Majesty’s government needed a naval base on the New England seaboard to protect against American privateers and serve as a loyalist refuge.  To support this requirement, seven hundred Redcoats landed on the Bagaduce Peninsula in June 1779 and began constructing fortifications.

Determined to oust the British, the Commonwealth of Massachusetts organized an expedition with 1000 militiamen commanded by General Solomon Lovell.  Transporting Lovell’s force was a fleet of 44 ships commanded by Continental Navy Captain Dudley Saltonstall.   Neither Saltonstall nor Lovell were given overall command of the campaign – they were instead encouraged to cooperate with each other.

The hastily organized expedition arrived in Penobscot Bay on July 24th and found British fortifications half completed.  On July 28th American marines and militiamen successfully landed on the peninsula, and fighting both the British and the steep, forested terrain, drove the defenders back to their partially built fortifications.  The fort was ripe for the taking .  The British commander certainly thought so, later stating “ I only meant to give them one or two guns so as not to be called a coward, and then strike my colors.”  However, with victory within reach, General Lovell, who lost control of his force during the assault, ordered a halt and directed his flabbergasted subordinates (who had a clearer picture of the situation than their general) to initiate a siege.


Deterioration

The situation rapidly deteriorated for the Americans.  The militiamen soon tired of siege warfare, and many of them spent their time in the rear skulking in the woods.  Saltonstall and Lowell conducted over 10 councils –  described by one observer as “more like a meeting in a coffee house than a council of war”.  The Commodore insisted he could not engage the three enemy ships in the harbor until the British guns on the peninsula were silenced, and the General responded  this was not possible until the British ships were eliminated.   While the American commanders dithered, the British strengthened their fortifications and sent for help.  

It was soon forthcoming.  On August 13th, a seven ship  British relief squadron arrived, and the seeds of disaster planted by the ineffective American command structure now came to fruition.  Lovell was able to reembark his men on the transports and set sail up the Penobscot, intending to establish a defense upriver.  Saltonstall deployed his warships to protect the transports.

However, as the British squadron closed, Saltonstall (without informing Lovell) determined his  ad-hoc fleet would be no match for the enemy squadron.  Without firing a shot, he ordered his warships to retreat upriver, telling one of his captains, “we must all shift for ourselves.”  A John Paul Jones moment it was not.


Hope gone

The troops on the transports initially cheered the rapidly approaching American warships.  Cheering stopped when the warships sailed past the transports, leaving them to the tender mercies of the British frigates.  Deciding discretion was the better part of valor, the transport captains ran their ships aground, disembarked their passengers, and set their vessels afire.  The militia dispersed into the woods – without leadership, discipline, or any inclination to continue hanging around Penobscot.  The fleeing warship captains followed the example set by their transport vessel comrades, and the pursuing British marveled  as ship after ship went up in flames. 

There was to be no defensive stand along the Penobscot River.  Summing up the situation, Lovell later said “an attempt to give a description of this terrible day is out of my power.”

The majority of the 3,000 Americans participating in the ill-founded campaign survived the ordeal – over 2,500 of them eventually making it home.  The British suffered less than 100 casualties and occupied Penobscot Bay until the end of the war.  Commodore Saltonstall was cashiered from the Continental Navy in recognition of his loss of an entire 44 ship fleet – the worst disaster in U.S. Naval history until the 1941 attack at Pearl Harbor.


Lessons Learned:

1)     Committees should plan festivals, not military campaigns; the lack of a single overall commander set the stage for failure.

2)     Councils of war rarely lead to success in battle; especially when nothing of consequence is discussed or decided.

3)     Amphibious operations imply land-sea coordination; unfortunately, Saltonstall and Lovell could not even agree on an overall course of action.

4)     Few naval battles are won by sailing out of harm’s way; Saltonstall’s refusal to engage the British relief force sealed his defeat.

5)     Coordinated actions require a commander; Saltonstall effectively ceded command during the retreat up the river, allowing the fleet to be exterminated piecemeal.

6)     Discipline is a necessity; when the going got tough, the militia got going – home.

7)     Quality trumps quantity; the huge American fleet was poorly crewed, badly led, and disintegrated when faced by a smaller, but well trained enemy squadron.

8)     Force protection can be carried to extremes; Saltonstall saved most of his personnel but abandoned  his mission and sacrificed his fleet.

9)     Ad hoc military operations seldom succeed when facing competent professional foes.


Did you find that piece interesting? If so, join us for free by clicking here.

The Battle of Valcour Island, fought on October 11th 1776 is one of the most fascinating naval engagements fought in North America. A victory for the British, the small but determined American force under General Benedict Arnold fought tenaciously and subsequently managed to delay a British invasion south for nearly a year. This granted valuable time for the Americans to better consolidate their positions for the inevitable offensive which would culminate at the Battles of Saratoga in 1777, a decisive victory for the Americans and the turning point in the War for Independence.

Brian Hughes explains.

A depiction of the Battle of Valcour Island.

In Autumn of 1776 the outlook did not look favorable for the fledgling United States. The Battle of Long Island was a catastrophe for the Continental Army. George Washington had managed to salvage a fraction of his force, just barely escaping encirclement and annihilation as he retreated across New Jersey. Washington also faced the loss of most of the militia forces as the end of the year approached and their terms of enlistments expired.

The Americans faced setbacks in the north as well. The expeditionary force which had invaded Canada the previous year had been dislodged by a renewed British counterattack. The Northern Army was forced to discard valuable equipment and suffered significant casualties as a result. The British and their mixed force of various German, Indigenous and Canadian allies were now well poised to launch an invasion south down the strategic Champlain-Hudson Corridor, severing New England from the middle Colonies and linking up with the substantial British force pursuing Washington. If successful this operation would likely end the rebellion. 


Fort Ticonderoga

Fortunately for the Americans they still possessed Fort Ticonderoga, strategically situated between Lake(s) Champlain and George which they had captured the previous year. Major General Philip Schuyler Commander of the Northern Army recognized the tenuousness of the situation and with great resourcefulness integrated his defenses to the best of his ability. In addition to Fort Ticonderoga the Americans maintained a modest flotilla of ships to aid in their defenses. The decision was made to further augment American naval capabilities on the Lake as a means to challenge the maritime supremacy of the British to their north. The Americans however did not possess a noteworthy supply of trained seaman and commanders. The few experienced sailors within the American cause tended to prefer privateering on the high seas as the potential for prize money was a far more appealing incentive for the experienced mariner. One notable American commander would however prove to be a major asset, Brigadier General Benedict Arnold.


Benedict Arnold

Prior to the war Benedict Arnold had been a successful sailor and merchant who frequently voyaged to the Bahamas, Canada and probably Europe. Not only was Arnold a competent and knowledgeable seaman he was also acquainted with ship construction, expertise which the Americans desperately required especially in the backcountry of Upstate New York. Beginning nearly from scratch, the Americans methodically began to construct a series of ships at Skenesborough, modern day Whitehall, New York. Philip Schuyler worked around the clock to provide the Americans with whatever material they required exacerbating an already difficult logistical situation. Meanwhile, the British to the north were likewise enlarging their naval capacities as summer gave way to fall and the window of opportunity for campaigning shortened. The American Armada gradually piecemealed their force up the lake as they awaited the completion of the final vessels. The issues of supplies and armaments still plagued the Americans as they were short of nearly everything from nails for the ships to food and powder and even warm clothing.

Numbering sixteen ships and termed the “Mosquito Fleet” because of the eclectic make up of vessels. In addition to standard square rigged gunboats Arnold ordered the construction of gondolas outfitted with a triangular or lateen sail. This design afforded greater maneuverability and agility particularly in some of the narrower coves and shorelines indenting Lake Champlain. The largest vessel in the American Armada was the Royal Savage which resembled a standard Ship of the Line albeit in smaller fashion. Guns were placed fore and aft as well as the sides as the inexperienced American gun crews had to drill without powder and ammunition saving what little they had for the upcoming engagement.

Arnold displayed impressive strategic and tactical instincts in predicting the British strategy. Knowing full well that the Americans could not parity British naval power and the superior training he would have to be creative. Arnold kept the British guessing by shielding his fleet within Valcour Bay, just off the New York shoreline near present day Plattsburgh. Due to the shape of Valcour Island a vessel sailing south could not detect the presence of ships to the west. By positioning his fleet here Arnold planned to force the British to give battle on unfavorable terms sailing upwind into a narrow cove in which he could negate their advantage in firepower. But this would be a gamble, as the British could opt to disregard the little fleet to their rear and continue pressing south thus forcing a hopeless pursuit. Also, Valcour Island could be easily cut off to the north and south, trapping Arnold’s fleet and granting no chance of escape. 


Guy Carleton

As the British fleet embarked it proved to be formidable. On board was Guy Carleton in nominal charge of the invasion. The British did however spend extra time ensuring the strength of their fleet as it was now mid-October and already snow was visible on the High Peaks of the Adirondack Mountains on Lake Champlain’s western shore. The American’s had been waiting in anticipation for weeks at this point being at full mercy of the harsh northern elements without sufficient clothing and unable to go to shore due to frequent attacks from Indians loyal to the British.

Arnold arrayed his flotilla in a line of battle in Valcour Bay. As the British fleet began to sail south Arnold dispatched the Royal Savage and the highly nimble Congress to goad them into battle. In this they were successful but at cost to the Royal Savage which ran aground forcing its crew to flee. The British struggled to sail upwind and bring their superior firepower to bear on the Americans. Both sides began to exchange gunfire which wrought havoc on the ships and crew. The Battle lasted all day as casualties on both sides remained relatively light as the advent of darkness ended the engagement. The British found themselves in an ideal position to resume battle the following day as they weighed anchor with the knowledge that they had effectively nullified the American’s ammunition and powder from the battle. 


Bold decision

Arnold conferred with his officers and made a bold decision. The British fleet left just enough space for the remainder of the American boats to slip past single file and flee south. Muffling his oars Arnold led the column ever so closely past the warships standing sentinel as one by one the American flotilla fled south taking advantage of a favorable wind. As dawn broke the British were shocked. They could not fathom that the “trapped” American force would be capable of mounting an escape, they instantly gave chase. After a day-long pursuit the wind became less favorable for the Americans. On October 13th the British caught up with Arnolds fleet. Arnold scuttled his ships in the bottom of Buttonmold Bay on the Vermont side of the Lake stripping his ships of anything valuable as he led his troops overland and back to Fort Ticonderoga.

The British were surprised by the aggressive resistance by the Americans. Arriving at Crown Point on October 20th it appeared the winter was prematurely setting in. The lateness of the season coupled with the prospect of facing an even greater number of adversaries in a siege-based scenario forced the British turnaround and sail back to Canada and await the thaw of Spring. 

Arnold had achieved his objective. Despite losing the engagement of Valcour Island he managed to successfully delay a British invasion that likely would have put an end to the rebel cause. The Battle of Valcour Island resembled a nautical Bunker Hill. In spite of British victory, the dogged and resourceful Americans displayed courage in face of overwhelming odds inflicting horrendous casualties and reforming in good order to fight another day.


Did you find that piece interesting? If so, join us for free by clicking here.

Posted
AuthorHistory Is Now Magazine
CategoriesBlog Post

The Sullivan-Clinton Expedition Against the Iroquois took place in the summer of 1779 in New York and Pennsylvania. The attack came via a decision of George Washington as the Iroquois Native Americans were Allied with the British during the American Revolutionary War. Brian Hughes explains.

A woodcut print of the Burning of Newtown in 1779.

In the summer of 1779, a large serpentine column of American Forces under the command of Major General John Sullivan departed their camp in Easton Pennsylvania and proceeded northwest up the Wyoming Valley. Theirdestination, the large and fertile stretch of land comprising most of present-day Western New York State and home to the powerful Iroquois (Haudenosaunee) Confederacy, one of the most powerful tribes in North America and allied to Great Britain. Working in conjunction with Sullivan’s force was a smaller array of soldiers led by Brigadier General James Clinton who at the same time proceeded down the Mohawk Valley of New York State. The objective was the total devastation of the war making capabilities of the Iroquois-British alliance legitimized in response to the persistent raids launched on the New York and Pennsylvania frontiers by the Iroquois and their British/Loyalist allies. The campaign was launched in particular in retribution for the Iroquois-Loyalist raids into Pennsylvania and The Cherry Valley Massacre in New York the previous year. The result would be a catastrophe for the Iroquois leading to their ultimate demise thus forever changing American history.

Following the outbreak of hostilities in 1775 the Iroquois constituting the six nations of the Seneca, Cayuga, Tuscarora, Onondaga, Oneida, and Mohawk remained divided and confused by what they viewed as a civil war between Great Britain and her colonies. Neutrality could not be maintained indefinitely as increasing pressure fractured the cohesion of the confederacy as certain tribes began to take sides with the powerful Seneca and Mohawk choosing the British whom they were convinced had the best chance of success. Only the Oneida and some Tuscarora would fight for the Americans as the majority of the Iroquois became increasingly concerned with colonial encroachment on their ancestral land. A problem that the British at least attempted to delay. Raids and counterraids would ensue throughout the northern frontiers of New York and Pennsylvania in addition to pitched battles such as the appalling Battle of Oriskany in the Mohawk Valley of New York State where combined Tory and Patriot militias fought a gruesome battle with their respective Seneca and Oneida allies. The brutal clashes along the frontier would continue even as the major fronts of the war shifted from north to south. In 1778 a joint Iroquois-Loyalist raiding party attacked settlements in Cherry Valley New York and the Wyoming Valley of Pennsylvania killing combatants and noncombatants alike. The ferocity was appalling and cleverly propagandized. For American forces this was the final straw, the Iroquois Confederacy and their British enablers had to be dealt with.


Before the war

Before the war George Washington worked as a land surveyor in addition to being a planter and officer in the colonial militia. Like many other colonials Washington longed for the day in which the vast fertile lands of the Ohio country west of the Appalachian Mountains could be cultivated and settled. The Iroquois maintained a powerful position in regards to this region as swift and vicious wars of conquest enabled them to control virtual monopoly on the fur trade from Canada to the Mississippi River. It is widely speculated that desire to shift the power dynamics in this territory would be an additional impetus for the coming military enterprise. Washington devised a plan to invade the Iroquois homeland via a two-pronged invasion to advance on Fort Niagara, a strategic focal point between Western New York and Canada. As the dual columns advanced, they were instructed by Washington to devastate the lands, crops, and villages as a means to intimidate and nullify the total war making capabilities of the tribes deemed hostile to the United States. It is speculated that these tribes had upwards to three thousand warriors but this can’t be wholly substantiated. 


Command

Command of the expedition had initially been offered to Horatio Gates, victor of the Battles of Saratoga. Gates would decline on account of his age. Instead, command was given to Major General John Sullivan of New Hampshire who would operate in conjunction with Brigadier General James Clinton. Sullivan assembled his army at Easton, Pennsylvania departing up the Wyoming Valley in July 1779. Clinton advanced a month earlier in June, his initial objective being the town of Canajoharie on the Mohawk River. The American force disguised their intentions well, for an invasion of the Iroquois homeland seemed inconceivable given the size, terrain, and martial reputation of their people. The British speculated that the Americans would attempt another invasion of Canada as they had previously done in late 1775.  In August Sullivan arrived at the mixed white/indigenous settlement of Chemung, destroying the village in the process. The British forces were led by loyalist Colonel John Butler. Butler could muster no more than six hundred Indians and Loyalists to oppose the nearly five thousand man combined force of Sullivan and Clinton who had now linked up. Butler worked with renowned Mohawk war chief Joseph Brant and assembled a motley force of Loyalists, Rangers and Iroquois loyal to Great Britain to confront the American force at Newtown, present day Elmira New York. A fierce pitched battle ensued on the 29th of August as the combined application of infantry and artillery of the Americans rapidly overran Butler and Brant’s detachment. Following the battle Newtown was burned by the Americans. 


Newtown

Newtown would be the only large-scale pitched battle of the campaign. It is interesting that the outnumbered allied force of Loyalists and Iroquois deviated from traditional guerilla tactics and instead offered open battle. Sullivan and Clinton now possessed the tactical flexibility to systematically burn towns and settlements spanning the area around the Finger Lakes, the heartland of Iroquoia. Sullivan did however overextend his supply lines forcing his men to halt constantly and granting valuable time for refugees to flee. The devastation was enormous. It is estimated that up to forty towns and dwellings had been destroyed not to mention innumerable bushels of corn and other crops. The psychological toll in which the expedition took was even more significant passing into the collective memory of Iroquois descendants to this day. By launching such an unprecedented attack, the American did however unintentionally better solidify the British/Iroquois alliance. The Sullivan Expedition did not completely eradicate the especially hostile Seneca and Mohawk Nations and indiscriminately wreaked havoc on the more neutral leaning Onondaga and Cayuga. Even at the objections of their Oneida allies. But it would be the beginning of the end of Iroquois hegemony in northern regions of North America. The final nail in the coffin indeed would be the ultimate defeat of Great Britain a few years later.


In perspective

The Sullivan Expedition in many ways was a precursor to William Tecumseh Sherman’s March through Georgia during the American Civil War. Although not as entirely successful, it demonstrated the willingness of a lethal and well-coordinated mobile force to invade an immense swathe of land, ravishing it along with its inhabitants all while taking relatively few casualties. It remains a pivotal and often overlooked chapter of the American Revolution.


Did you enjoy the piece? If so, join us for free by clicking here.

Posted
AuthorHistory Is Now Magazine
CategoriesBlog Post

Benedict Arnold (1740-1801) was an American born Major General during the American Revolutionary War. However, he changed to the British side during the war. Here, Richard Bluttal considers whether Benedict Arnold was a traitor or hero.

A 1776 portrait of Benedict Arnold.

John André had been warned to keep inland, but instead he shifted west until he was riding down the Albany Post Road, which follows the edge of the Hudson. He rode on safely until 9 a.m. on September 23, 1780, when he arrived at the crossing of a stream known as Clark's Kill, which today forms the boundary between Tarrytown, New York, and Sleepy Hollow, New York (and has since been renamed the André River). Here three young men - John Paulding, Isaac Van Wart and David Williams - stopped him.  André believed that these three were Loyalists because Paulding was wearing a Hessian soldier's uniform. Paulding had himself escaped from a British prison only days earlier, aided by a sympathetic Loyalist who provided him with the uniform. "Gentlemen," André said, "I hope you belong to our party." "What party?" asked one of the men. "The lower party", replied André, meaning the British, whose headquarters were to the South. "We do" was their answer. André then declared that he was a British officer who must not be detained. To his surprise, Paulding informed him "We are Americans," and took him prisoner. André then tried to convince the men that he was a US officer by showing them the passport given to him by Mr. Arnold. But the suspicions of his captors were now aroused; they searched him and found papers and the plans for West Point hidden in his stocking that was not meant for Americans.

André later testified at his trial that the men searched his boots for the purpose of robbing him. Whether or not this was true, the laws of New York State at the time permitted the men to keep whatever booty they might find on a Loyalist's person.

British Major John André was one of the most famous prisoners of the Revolutionary War. A favorite of British General Sir Henry Clinton, the handsome young major was also popular with Philadelphia "high society;" intelligent and witty, André was noted for the elaborate entertainments he wrote and designed for parties.

Scheming

Benedict Arnold approached the British with his scheme to help them take control of West Point. André served as the messenger between Arnold and General Clinton. On September 21, 1780, André met with Arnold, and Arnold gave him confidential documents, including a map of West Point. André intended to return to British General Clinton and give him the documents. André was part of American General Benedict Arnold's treasonous plot to surrender the strategic American fortification at West Point to the British. Arnold delivered key information about West Point's weaknesses to General Clinton through André, meeting him on the banks of the Hudson River.

This was long after Benedict Arnold was known as an American hero. The name Benedict Arnold is synonymous in American history with the word traitor. His name is almost a synonym for treasonous behavior so despicable, his many contributions to American Independence before becoming a turncoat are largely forgotten.

Arnold actually built a very impressive military career before his defection to the British army. During the American Revolution, Arnold quickly established himself as one of George Washington’s best generals. Realizing the strategic importance of securing New York, Arnold mustered a group of men and headed toward Fort Ticonderoga. Coordinating with Ethan Allen and his Green Mountain Boys, Arnold helped capture the fort for the Patriots.

Arnold believed the Continental Congress insufficiently rewarded his efforts, especially considering his sacrifices. Arnold lived extravagantly in Philadelphia and also engineered a variety of business deals that earned him a reputation for questionable practices in his desperate desire to impress Edward Shippen, a wealthy Philadelphia Loyalist, so that he could marry his 18-year-old daughter, Peggy.  Appointed to brigadier general, Arnold watched as Congress passed him over for promotion to the post of major general five times in favor of his subordinates. Arnold had every intention of resigning from military service following these outrages but not for Washington’s insistence that he stay. He was rewarded in 1777 with a promotion to major general and a post as military commander of Philadelphia. Continental officials could not confirm Arnold’s suspected betrayal until 1780 when hard evidence of his treason was uncovered through his relationship with John Andre. In 1780, Arnold was given command of West Point, an American fort on the Hudson River in New York (and future home of the U.S. military academy, established in 1802).

Complexity

 Arnold contacted Sir Henry Clinton, head of the British forces, and proposed handing over West Point and his men. While Arnold’s betrayal was clear—he offered the British seizure of the military fortress at West Point, NY, in exchange for 10,000 pounds and a British military commission—what led up to that moment of betrayal is more complicated.

Why did Benedict Arnold betray the US? Historians have several theories about why Arnold became a traitor: greed; mounting debt; resentment of other officers; a hatred of the Continental Congress; and a desire for the colonies to remain under British rule.  Eric D. Lehman, author of Homegrown Terror: Benedict Arnold and the Burning of New London, notes that others at the time had similar character issues but they did not betray their country. Lehman spent time looking over Arnold’s letters and other first-hand accounts.

“Some seemed to point to him ‘lacking feeling,’ i.e. sociopathic, but others showed him having too much feeling—he couldn’t control his temper. The number one thing I found across all of them was his selfish ambition, which came from a profound lack of self-esteem as a child and young man,” Lehman says.

Lehman thinks it’s important to remember the whole story of Arnold—his betrayal wasn’t just treason. The British, who had much to gain from Arnold switching sides, found him dishonorable and untrustworthy.

“One thing that has been left out of so many tellings of Arnold’s story is that he didn’t stop after his West Point treason was discovered,” Lehman points out. “He went on to attack Virginia—almost capturing Thomas Jefferson—and then attacking Connecticut, his home state.

“Spying was one thing, but his willingness to switch sides in the middle of an armed conflict, and fight against the men who had a year earlier been fighting by his side, was something that people of that time and maybe ours could simply not understand.”

Conclusion

Arnold would continue to serve in the military, only now he served the British against his former countrymen. In December, he led a force of British troops into Virginia, capturing Richmond and laying waste to the countryside. Arnold would die in 1801, leaving behind him a legacy as America’s most notorious traitor. As for John Andre, he was moved from Headquarters, to West Point, and finally to Tappan, where he was housed in a tavern. There, as the verdict was decided that André was acting as a spy by going behind enemy lines and disguising his uniform, he wrote a courageous letter, dated September 29, 1780, to his Commander, General Henry Clinton.  All the men on both sides were amazed at the turn of events. The American men admired André for his gallantry as much as the British did for his leadership. No one wanted him to die, but Washington had to be firm and did not back down. André was hanged as a spy at Tappan, New York, on October 2, 1780. He was mourned even by his enemies.

What do you think of Benedict Arnold? Let us know below.

Now read Richard’s article on the role of baseball in the US Civil War here.